Today I would like to write about something that I have been doing for the past year: portraiture. Portraiture itself is a broad term, and I have no claims to declare myself an expert on the matter; regardless, I still want to write notes about it. One shoot in particular taught me a lot: a night session built around a location rather than a model.
Table of Contents
Planning the Shoot
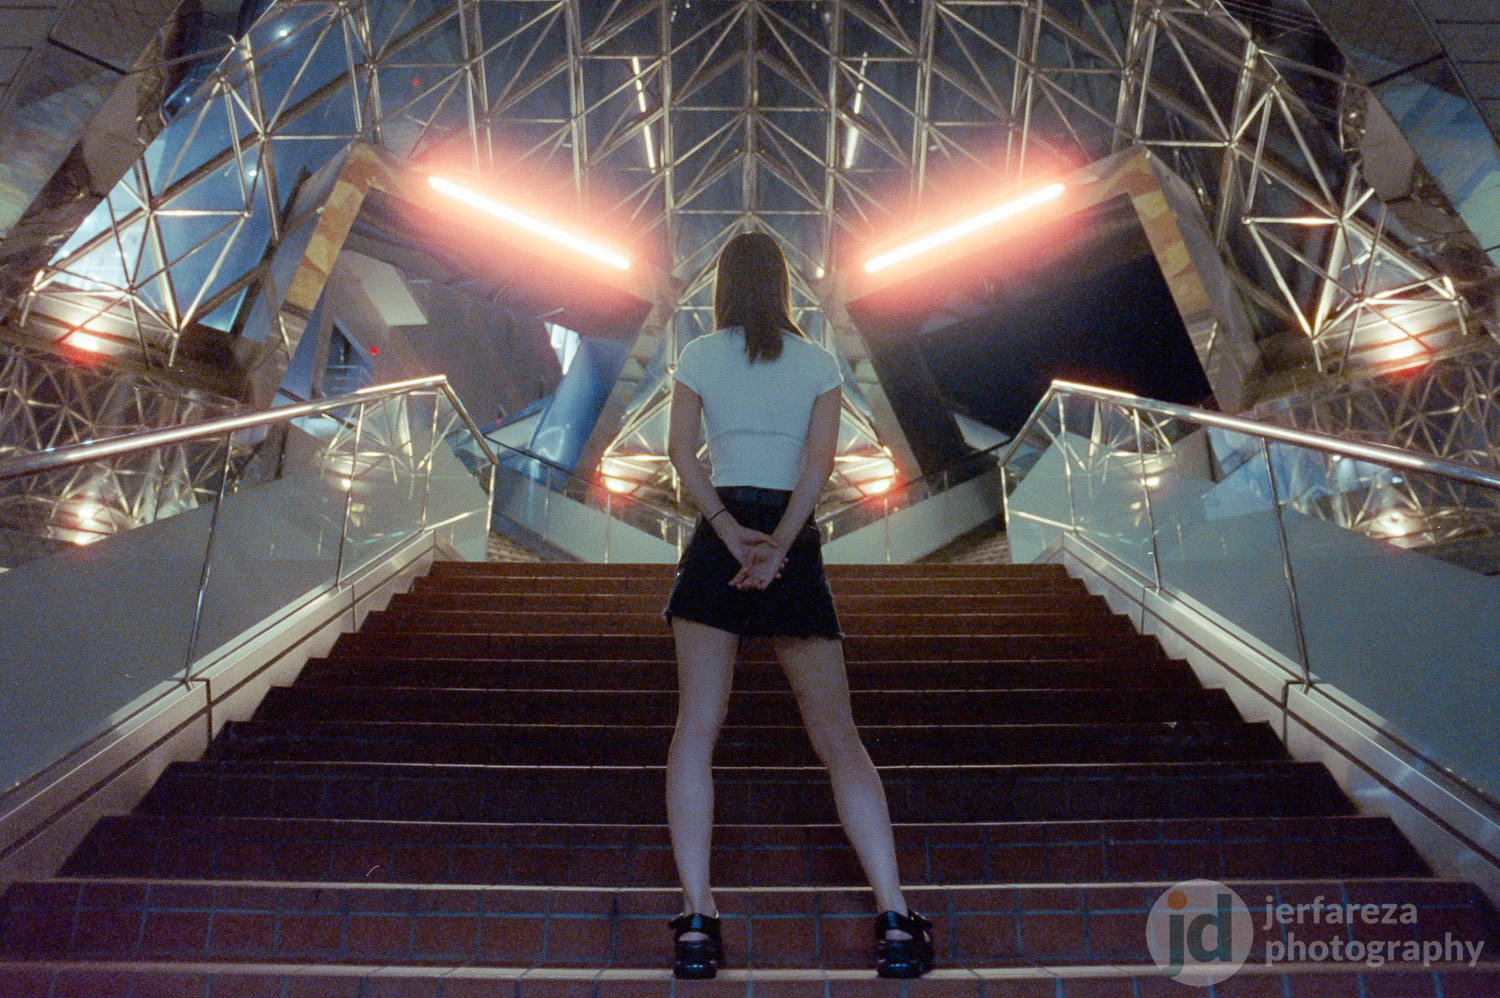
This was the idea that started the whole shebang. There was a specific location I knew that could be a striking backdrop for a photoshoot at night. I had previously snapped a shot of the location using CineStill 800T film stock, and I imagined how cool it would be if I did a model photoshoot there.
For a photoshoot, I usually start with the subject first. You could already surmise that this time I did not plan a photoshoot location or style based on the subject/model that I would be working with, but rather the other way around. I wanted the location to be the primary focus point. The subject would have to conform to the scene, to be part of it and not stand out. The outcome had to be gritty, less clinical and thought-provoking.
Ideally, I’d have shot only with film to match the ambience of the above image. But seeing that I wasn’t confident enough to do a film-only photoshoot, let alone at night, I decided to shoot mainly digital with film in between, just like what I have been doing so far.
Key points for the shoot:
- Utilize available light sources, but add your own when needed.
- Sharpness is not important; tone down the cleanliness, play around with shutter drag.
- Standard zoom 24-70mm for digital and wide-angle 20mm & 50mm manual focus for film (Nikon FM).
- ISO 800 film stock with a tungsten mood. I chose Marix 800T instead of CineStill this time because of its affordability.
On-Location Observation
On the day of the shoot, the conditions were accommodating. I made sure to confirm weather forecast beforehand (sunny, no wind) and communicated the photoshoot idea to the model. She arrived on time, and we proceeded to take the hero shots.
The beginning was not smooth. This was expected because it was the first time working with the model, and I usually take some time to warm up before getting into the zone. The stairs were adequately lit; few people were around, so nobody interrupted the flow. I even brought out the film camera for some shots with 20mm and 50mm (shutter speed under 1/30 all the time with the widest aperture).
Still, the shots we took weren’t like what I imagined, so I decided to change location to swing the mood — a pedestrian deck with bright street lights, thinking I could revisit the original location later to try one more time.
This was where it got better. I was able to direct the model for a straight flash look. Direct flash is not flattering to skin, but who’s to say you can’t make it work depending on the situation. Since I wanted a gritty look, this was within tolerable limits. I even threw in some shutter drag shots as an experiment, which came out pretty okay.
Halfway through the shooting time, I decided to come back again to the stairs with renewed energy, hoping to get the hero shots. Using mostly digital with 1/15s shutter speed, this time we nailed it. Everything just fell into place. There was something different, and we proceeded to go with the flow and ended the shoot with a bang.
Takeaways
Judging from the on-location write-up above, you must be thinking the first half of the shoot was a bust, didn’t you? Looking at just the digital shots, I initially thought so too. The first twenty minutes did not yield any favourites; they were just okay.
But film photos proved otherwise; they captured the initial feel that I wanted to capture in the first place. Granted, since I wasn’t using flash, the model blended into the scene as opposed to being the center focus. However, that was exactly what I pictured in mind!
The latter half was where the digital camera shone though. After finding the right setup for flash, playing around with shutter drag was fun, albeit most of it was just a lot of trial and error. I nailed the hero shots with both digital and film flavors.
If I could change some things to make the shoot better:
- Do a thorough “meter once for ambience, then meter again for flash exposure” before rushing to get the shot.
- Use flash for film photos too — at least just a small amount of light to light up the face.
- Perhaps it’s a skill issue, but keeping the film camera steadier would have produced fewer blurry shots from the shake caused by slow shutter.
If you’ve made it this far, thank you very much for reading the entire thing. Writing up from a real photoshoot experience is unexpectedly fun, and I would probably write more. Let me know in the comments if you’d like to see me write something like this again.
More Photos From the Session
Some more favourite shots (digital and film mixed).